
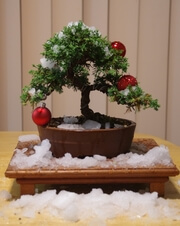
and the finished tree
Slightly rotated to remove the straightness in the lower right of the trunk, the downside is that I lose a little of the middle trunk from the front, but in person one can move around the tree to take it all in, and the right hand trunk draws the eye much more and the straight section at the bottom is more of a flaw
Hope you all enjoy, and got something out of the journey. I very much enjoyed putting it together
Kerrin
step by step from raw stock
-
kez
- Aussie Bonsai Fan

- Posts: 694
- Joined: November 4th, 2013, 6:47 pm
- Favorite Species: Pines, Junipers
- Bonsai Age: 0
- Location: Wollongong
- Been thanked: 27 times
Re: step by step from raw stock
You do not have the required permissions to view the files attached to this post.
-
Theodore

- Aussie Bonsai Fan

- Posts: 268
- Joined: November 28th, 2015, 10:12 am
- Favorite Species: Larch
- Bonsai Age: 24
- Bonsai Club: Albury Wodonga Bonsai Society
- Location: Wodonga
- Has thanked: 3 times
- Been thanked: 2 times
Re: step by step from raw stock
Very impressive Kerrin.
Merry Christmas!
Sent from my iPad using Tapatalk
Merry Christmas!
Sent from my iPad using Tapatalk
-
kvan64

- Aussie Bonsai Fan
- Posts: 1627
- Joined: September 10th, 2009, 9:46 pm
- Favorite Species: black pine
- Bonsai Age: 16
- Location: brisbane
- Has thanked: 6 times
- Been thanked: 36 times
Re: step by step from raw stock
Very nice stock. A little separation between the trunks will make the final design head-turner!
Always we hope someone else has the answer.
Bonsai is an art of shrinking.
Bonsai is an art of shrinking.
-
kcpoole
- Perpetual Learner
- Posts: 12292
- Joined: November 12th, 2008, 4:02 pm
- Favorite Species: Maple
- Bonsai Age: 15
- Bonsai Club: the School Of Bonsai
- Location: Western Sydney, NSW, Australia
- Has thanked: 19 times
- Been thanked: 96 times
- Contact:
Re: step by step from raw stock
Excellent result ( again) and thanks for the tutorial.
Many will read this and benefit immensely I think
Ken
Many will read this and benefit immensely I think
Ken
Check out our Wiki for awesome bonsai information www.ausbonsai.com.au/wiki
What is Bonsai? http://www.ausbonsai.com.au/wiki/index.php?title=Bonsai
What should I do now? http://www.ausbonsai.com.au/wiki/index.php?title=Newbie
How do I grow a Bonsai? http://www.ausbonsai.com.au/wiki/index. ... _a_Bonsai?
Visit a Bonsai nursery to see some real nice trees http://www.ausbonsai.com.au/wiki/index. ... _Nurseries
-
Pearcy001

- Aussie Bonsai Fan
- Posts: 1307
- Joined: February 8th, 2015, 7:23 pm
- Favorite Species: Natives and Exotics
- Bonsai Age: 0
- Location: Yarraville, VIC
- Been thanked: 81 times
Re: step by step from raw stock
Great job Kez, I loved following your steps. Will definitely be reading over this again next time I go to style some raw stock.
Did you focus mainly on the front view, or all 4 sides? I'd love to see the back and side views, both to see your branch placement etc and simply out of being intrigued if you wouldn't mind.
Thanks again and Merry Christmas!
Did you focus mainly on the front view, or all 4 sides? I'd love to see the back and side views, both to see your branch placement etc and simply out of being intrigued if you wouldn't mind.
Thanks again and Merry Christmas!
-
kez
- Aussie Bonsai Fan
- Posts: 694
- Joined: November 4th, 2013, 6:47 pm
- Favorite Species: Pines, Junipers
- Bonsai Age: 0
- Location: Wollongong
- Been thanked: 27 times
Re: step by step from raw stock
thanks for the kind words folks, was a bit of a scary one, especially once I had that first post up haha
Pearcy,
In my opinion while bonsai should be 3d, there is always an intended front, so the styling will be intended on being viewed from the front and as such this is the picture you intend to give the viewer, however good styling will produce a tree that is well layed out from all sides. This is where depth comes in a design comes from, and the last thing anybody wants to see is a tree that looks fantastic from the front, but as soon as somebody moves away from that angle it looks rubbish.
Here's the right side Back Left Hope this helps to build a clearer picture
Merry Christmas everyone
Kerrin
You do not have the required permissions to view the files attached to this post.
-
Ray M
- Aussie Bonsai Fan
- Posts: 1403
- Joined: November 5th, 2009, 3:36 pm
- Favorite Species: Figs, Junipers, Maples, Elms, Pines, Banksias
- Bonsai Age: 31
- Bonsai Club: The School of Bonsai
- Location: Winston Hills NSW
- Been thanked: 16 times
Re: step by step from raw stock
Hi Kez,
A very blessed Christmas mate. That is coming along very nicely. Thanks for sharing it's progression.
Regards Ray
A very blessed Christmas mate. That is coming along very nicely. Thanks for sharing it's progression.
Regards Ray
-
peterb

- Aussie Bonsai Fan
- Posts: 733
- Joined: October 4th, 2011, 5:09 pm
- Favorite Species: olive
- Bonsai Age: 5
- Location: adelaide
- Been thanked: 1 time
Re: step by step from raw stock
Hi Kez, thanks for putting that together for us to benefit from . As usual a top tree from Kez . That deserves a toast 
peterb
peterb
-
kez
- Aussie Bonsai Fan
- Posts: 694
- Joined: November 4th, 2013, 6:47 pm
- Favorite Species: Pines, Junipers
- Bonsai Age: 0
- Location: Wollongong
- Been thanked: 27 times
Re: step by step from raw stock
one last bit of fiddling,
I removed a branch from the right trunk that was being used to build up the apex on the left. this was a fault and also served to join the 2 trunks, and also make a bridge in the form of a branch that was always to me going to stick out
so..... The apex on the left needs to fill in, but it will, and when it does I think it makes a much better design,
what does everyone else thing?
Kerrin
You do not have the required permissions to view the files attached to this post.
-
wrcmad
- Aussie Bonsai Fan
- Posts: 555
- Joined: April 25th, 2014, 10:57 pm
- Favorite Species: Trident maple, JB Pine
- Bonsai Age: 39
- Location: Northern NSW
- Has thanked: 146 times
- Been thanked: 83 times
Re: step by step from raw stock
I followed your progression with interest.
Great job.
A very elegant tree... and quite unique.
Kudos to you.
Great job.
A very elegant tree... and quite unique.
Kudos to you.
-
melbrackstone

- Aussie Bonsai Fan
- Posts: 3542
- Joined: December 15th, 2015, 8:05 pm
- Favorite Species: the ones that live
- Bonsai Age: 28
- Bonsai Club: Redlands, BIMER, VNBC
- Location: Brisbane
- Has thanked: 1325 times
- Been thanked: 811 times
- Contact:
Re: step by step from raw stock
Wow, thanks so much Kez! Very impressive, I look forward to seeing how it progresses.
-
kez
- Aussie Bonsai Fan
- Posts: 694
- Joined: November 4th, 2013, 6:47 pm
- Favorite Species: Pines, Junipers
- Bonsai Age: 0
- Location: Wollongong
- Been thanked: 27 times
Re: step by step from raw stock
Got my act together today and took the next step with this tree,
Had to re-arrange the re-bar to enable the work but here is the end result
Looking back on the last pic I am surprised at the growth since the first work!
Hope you all enjoy
Kerrin
Had to re-arrange the re-bar to enable the work but here is the end result
Looking back on the last pic I am surprised at the growth since the first work!
Hope you all enjoy
Kerrin
You do not have the required permissions to view the files attached to this post.
Last edited by kez on April 20th, 2016, 12:06 pm, edited 1 time in total.
-
EJZ
- Aussie Bonsai Fan

- Posts: 67
- Joined: April 6th, 2012, 6:30 pm
- Favorite Species: native
- Bonsai Age: 3
- Bonsai Club: School of Bonsai
- Location: Sydney
- Contact:
Re: step by step from raw stock
You have achieved a tree that really looks aged in less than a year.
Excellent work mate
Excellent work mate
Eugene
-
Ray M
- Aussie Bonsai Fan
- Posts: 1403
- Joined: November 5th, 2009, 3:36 pm
- Favorite Species: Figs, Junipers, Maples, Elms, Pines, Banksias
- Bonsai Age: 31
- Bonsai Club: The School of Bonsai
- Location: Winston Hills NSW
- Been thanked: 16 times
Re: step by step from raw stock
Hi Kez,
The tree is looking very good mate. Thanks for taking the time to update this thread. I'm sure it will be an encouragement for others to have a go at a project like this one.
Regards Ray
The tree is looking very good mate. Thanks for taking the time to update this thread. I'm sure it will be an encouragement for others to have a go at a project like this one.
Regards Ray
-
Pearcy001
- Aussie Bonsai Fan
- Posts: 1307
- Joined: February 8th, 2015, 7:23 pm
- Favorite Species: Natives and Exotics
- Bonsai Age: 0
- Location: Yarraville, VIC
- Been thanked: 81 times
Re: step by step from raw stock
Reading over your thread again Kez (I have it bookmarked  ). I must say, it does look mighty fine potted up. I can't get over the growth it has put on! It's going to keep getting better and better.
Can I ask, do you pinch growing tips heavily to keep it in check? I had my first crack at styling a Juniper a few weeks back and it's recovering/growing nicely. Due to reading excess pinching can cause the trees health to deteriorate I have been a bit hesitant to do it. What are your thoughts?
Cheers,
Pearcy.
Sent from my SM-G920I using Tapatalk
