
Hey everyone,
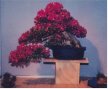
Here be my first attempt at a landscape using Juniperus Pingii. There is a semi-cascade on the big rock which is being held up by a smaller rock (this ones just a temp until the roots take hold - it has been wired down to the rock). The moss has only recently been placed on there and will take a bit of time to bridge all of the gaps.
Let me know what you guys think, I definitely think this can be improved a bit so throw it at me.
-Mo
Juniper Landscape
-
MoGanic
- Aussie Bonsai Fan

- Posts: 1250
- Joined: May 3rd, 2012, 7:15 pm
- Favorite Species: Shimpaku
- Bonsai Age: 0
- Location: Victoria
Juniper Landscape
You do not have the required permissions to view the files attached to this post.
There are many ways to do things, but only one "best" way.
-
squizzy
- Aussie Bonsai Fan
- Posts: 1438
- Joined: March 2nd, 2011, 4:12 pm
- Favorite Species: pines
- Bonsai Age: 10
- Location: sydney
- Has thanked: 20 times
- Been thanked: 13 times
Re: Juniper Landscape
Hey mo the landscape looks great but I think you might have trouble with that root over rock if you have just planted it there. I think the idea is to wire it to a rock first then bury the lot so the roots develope around the rock for a few years under ground. junipers probably a few years more. after a few years you start to plant the rock and tree higher and gradually wash the soil away leaving the roots exposed but clasping the rock. There should be a better tutorial on here somewhere.
I like the setout though.
Squizz
I like the setout though.
Squizz
1 1 2 3 5 8 13 21 34 55..............................
-
MoGanic
- Aussie Bonsai Fan
- Posts: 1250
- Joined: May 3rd, 2012, 7:15 pm
- Favorite Species: Shimpaku
- Bonsai Age: 0
- Location: Victoria
Re: Juniper Landscape
I figured that might have been a bit of a problem, it does have two large roots which actually go over the edge of the rock and down into the soil below though - both of these had several feeder roots. One of those is right up the front of the tree but I think the quality of the picture makes it difficult to see. Do you think this might be enough to keep the tree going? They were about 1/5th the total root mass each.
There are many ways to do things, but only one "best" way.
-
squizzy
- Aussie Bonsai Fan
- Posts: 1438
- Joined: March 2nd, 2011, 4:12 pm
- Favorite Species: pines
- Bonsai Age: 10
- Location: sydney
- Has thanked: 20 times
- Been thanked: 13 times
Re: Juniper Landscape
To be honest moganic I think I can see fro the pic there are a lot of exposed roots on the left hand side of the rock. If that is the case I think you would be best to get the tree back into some good potting mix but this is just an opinion from someone with a limited experience wit root over rock process. I have only done figs with this technique but I would imagine figs are more forgiving than junipers.
Why dont you wait and see what others say and make a call based on everyones feedback. I may be wrong this may be quite an exceptable way of doing it.
Good luck
Squizz
Why dont you wait and see what others say and make a call based on everyones feedback. I may be wrong this may be quite an exceptable way of doing it.
Good luck
Squizz
1 1 2 3 5 8 13 21 34 55..............................
-
MoGanic
- Aussie Bonsai Fan
- Posts: 1250
- Joined: May 3rd, 2012, 7:15 pm
- Favorite Species: Shimpaku
- Bonsai Age: 0
- Location: Victoria
Re: Juniper Landscape
Cheers mate, I'll wait and see. Although most seem to be in agreement with what you are saying - bury the rock and let it develop. If the tree starts to lose health I have several that can replace it haha so all good. 
There are many ways to do things, but only one "best" way.
-
alpineart

- Aussie Bonsai Fan
- Posts: 4737
- Joined: July 14th, 2009, 9:04 pm
- Favorite Species: Pinus Maples
- Bonsai Age: 26
- Bonsai Club: Ausbonsai
- Location: Myrtleford VIC
- Has thanked: 5 times
- Been thanked: 154 times
- Contact:
Re: Juniper Landscape
Hi MoGanic , i like your penjing it has appeal . No harm in having a go that's for sure . If it was mine i would move the larger rock closer to the center but not center .It sit at the rear of the tray now , simply bring it forward just behind the center point of the tray but directly forward to where you have placed it . As for the root over rock , red scoria is quite soft and can be carved using a masonary disc , hacksaw masonary drill etc , that being the case i would carve out the rock to either create a pocket and / or several crevices for the longer roots to travel to the bottom of the tray and fill with potting/bonsai mix , not too free draining . The scoria retains moisture but definitely not enough to have the plant sit on top and grow on . The sun will dry it out quite quickly as it heats up , thus cooking the roots
As Sqizzy has said they are best tied onto the rock and buried , however i have done plenty of ROR , carving the scoria to suit the roots . If moss is placed onto a root mass or on a landscape it is difficult to get water to penetrate leading to the likely hood of your plants dying or that particular area drying out or not get wet at all . Thinning the moss out having small gaps is a way to alleviate dryness , it will grow together again so it needs maintaining just like a bonsai , thinning out regularly . Over a period ,about 2 years the moss will have deposited spores in and around the landscape and the initial moss can be almost completely removed . When i use collected moss i remove the majority of the soil from the underside , soaking in water first them simply cutting the soil with scissors like one would clip hair This leaves a very thin layer of soil and the moss is undamaged . The water can penetrate quite easy but the moss will also dry out much quicker .
If the moss dies out over summer leave it in place as come winter it will green up again in most cases . Tough day at the office so i hope this makes sense .
Cheers Alpineart
-
Andrew Legg
- Aussie Bonsai Fan
- Posts: 1404
- Joined: June 24th, 2010, 6:23 pm
- Favorite Species: The ones that don't die
- Bonsai Age: 15
- Bonsai Club: Oyama Bonsai Kai, Ausbonsai
- Location: Cape Town, South Africa
- Been thanked: 2 times
Re: Juniper Landscape
Mo,
I'm going to comment on the story of the planting here. What I see is two different plantings. One on the right which is plush and everyone is happy, and one on the left which is barren and windblown. These don't match up for me, and I'm not sire that they work together. In my mind, a seikei should tell a story, and this one seems confused to me.
That said, if this is your first bang at it, then well done to you sir. I'm as always at pains to point out that that's my opinion, and we all have different tastes! (a good thing). I guess the only big question I have is: what is the picture you are trying to depict?
What would I do differently ignoring the horticultural aspects?? Well I'd:
1.) Make more use of empty space at the front of the pot (you loose a lot of space behind the right hand planting)
2.) I'd try to join the two islands you have there and get that path running out from behind the tall rock.
Something like this perhaps?
Cheers,
Andrew
You do not have the required permissions to view the files attached to this post.
-
MoGanic
- Aussie Bonsai Fan
- Posts: 1250
- Joined: May 3rd, 2012, 7:15 pm
- Favorite Species: Shimpaku
- Bonsai Age: 0
- Location: Victoria
Re: Juniper Landscape
Hmm I can definitely see a better placement for the rock itself.alpineart wrote:Hi MoGanic , i like your penjing it has appeal . No harm in having a go that's for sure . If it was mine i would move the larger rock closer to the center but not center .It sit at the rear of the tray now , simply bring it forward just behind the center point of the tray but directly forward to where you have placed it . As for the root over rock , red scoria is quite soft and can be carved using a masonary disc , hacksaw masonary drill etc , that being the case i would carve out the rock to either create a pocket and / or several crevices for the longer roots to travel to the bottom of the tray and fill with potting/bonsai mix , not too free draining . The scoria retains moisture but definitely not enough to have the plant sit on top and grow on . The sun will dry it out quite quickly as it heats up , thus cooking the roots
As Sqizzy has said they are best tied onto the rock and buried , however i have done plenty of ROR , carving the scoria to suit the roots . If moss is placed onto a root mass or on a landscape it is difficult to get water to penetrate leading to the likely hood of your plants dying or that particular area drying out or not get wet at all . Thinning the moss out having small gaps is a way to alleviate dryness , it will grow together again so it needs maintaining just like a bonsai , thinning out regularly . Over a period ,about 2 years the moss will have deposited spores in and around the landscape and the initial moss can be almost completely removed . When i use collected moss i remove the majority of the soil from the underside , soaking in water first them simply cutting the soil with scissors like one would clip hair This leaves a very thin layer of soil and the moss is undamaged . The water can penetrate quite easy but the moss will also dry out much quicker .
If the moss dies out over summer leave it in place as come winter it will green up again in most cases . Tough day at the office so i hope this makes sense .
Cheers Alpineart
With regards to the roots, a couple do reach the soil, and the rock came pre-carved by nature with a bit of a pocket for the root ball. I put some bonsai mix (not a well draining mix) in this pocket and then the roots, then some more soil and a bit of poking. I left two long roots out of this and let them hit the soil below, which is a fair draining mix (the actual pot doesn't have any draining holes, which I was told would be okay for this?). I think that this may be enough to keep the tree on top alive... barely... but I would prefer it to flourish so I might end up re-thinking this one.
The repositioning of the rock might also be preceded with some carving, drilling and a new tree that matches the remainder of the planting (cheers Andrew).
Ill be honest I wasn't particularly attempting a story hereAndrew Legg wrote:Mo,
I'm going to comment on the story of the planting here. What I see is two different plantings. One on the right which is plush and everyone is happy, and one on the left which is barren and windblown. These don't match up for me, and I'm not sire that they work together. In my mind, a seikei should tell a story, and this one seems confused to me.
That said, if this is your first bang at it, then well done to you sir. I'm as always at pains to point out that that's my opinion, and we all have different tastes! (a good thing). I guess the only big question I have is: what is the picture you are trying to depict?
What would I do differently ignoring the horticultural aspects?? Well I'd:
1.) Make more use of empty space at the front of the pot (you loose a lot of space behind the right hand planting)
2.) I'd try to join the two islands you have there and get that path running out from behind the tall rock.
Something like this perhaps?
Cheers,
Andrew
There are many ways to do things, but only one "best" way.
-
Tony Bebb
- Aussie Bonsai Fan
- Posts: 664
- Joined: November 25th, 2008, 10:42 pm
- Favorite Species: Conifers/Pines
- Bonsai Age: 28
- Bonsai Club: Bonsai Society of Queensland Inc.
- Location: Brisbane
- Been thanked: 6 times
- Contact:
Re: Juniper Landscape
G'day Mo
Well done on your first Saikei mate. The important thing is to have a go, and keep going.
For advice, like a lot of the other guys, I would change it around a bit to improve the flow and direction. Putting the rock on the right and moving the upright forest more to the middle would flow from the 'Mountains' to the 'Forest' to the 'Sea'. You could leave the Juni on the rock, but position other rocks around it so you could fill the space with soil and give it plenty to grow in. You could even put other trees in if you like.
More simply done, you could turn the rock with the juni around and build around it the same so it all went right from the 'Mountains' to the 'Forest'. Or you could tell us all to get stuffed and keep it as it is.

Tony
Well done on your first Saikei mate. The important thing is to have a go, and keep going.
For advice, like a lot of the other guys, I would change it around a bit to improve the flow and direction. Putting the rock on the right and moving the upright forest more to the middle would flow from the 'Mountains' to the 'Forest' to the 'Sea'. You could leave the Juni on the rock, but position other rocks around it so you could fill the space with soil and give it plenty to grow in. You could even put other trees in if you like.
More simply done, you could turn the rock with the juni around and build around it the same so it all went right from the 'Mountains' to the 'Forest'. Or you could tell us all to get stuffed and keep it as it is.
Tony
Imagination is more important than knowledge - Albert Einstein
Click here to visit my Blog - A Bonsai Journey
Click here to visit my Blog - A Bonsai Journey
-
MoGanic
- Aussie Bonsai Fan
- Posts: 1250
- Joined: May 3rd, 2012, 7:15 pm
- Favorite Species: Shimpaku
- Bonsai Age: 0
- Location: Victoria
Re: Juniper Landscape
G'day Tony,
That's quite an interesting point you make there about potentially adding new trees. I was beginning to think that condensing what I have on there now would be great (i.e. moving everything to the right hand side) so I have, from right to left, the forest, mountain and then the sea. But I thought just a large sea on it's own would be boring as all hell, so I'm thinking of using the space where the rock was to create a little "island" with a cliff element towards the mountain. Just trying to think about how to achieve this at a low height. Might carve one of the 50 scoria rocks I have laying around haha. Any thoughts?
Cheers,
-Mo
There are many ways to do things, but only one "best" way.
-
Tony Bebb
- Aussie Bonsai Fan
- Posts: 664
- Joined: November 25th, 2008, 10:42 pm
- Favorite Species: Conifers/Pines
- Bonsai Age: 28
- Bonsai Club: Bonsai Society of Queensland Inc.
- Location: Brisbane
- Been thanked: 6 times
- Contact:
Re: Juniper Landscape
Hi Mo
Good direction and balance in any Bonsai is to have the tree planted to one side of the pot so it leans over the centre line. ie if it leans to the right, it is potted on the left. With groups the main tree is position to the side of the centre line with the smaller trees on the side of the direction, with more open ground on the same side. With Saikei the high point is normally on one side moving down on the side of the direction with open ground on that side as well. This creates good direction and balance within the composition, and is a foundation principal for Bonsai design.
If you move from the Forest to the Mountain to the Sea, the high point would be more centered and the composition would not be so directional. Open ground, or Sea on the side of the direction is a good thing, but how much is variable. As always you are free to create what you like, as it will be with you and you have to like what you do. As i said before, you could simply turn the Sea into Mountains, or as you Suggested make Islands in the Sea to make the high point on the left as you have enough open ground on the right. This would make the composition move to the right, but I would turn the tree you have on the rock around so it moves to the right.
Food for thought, but most of all enjoy the meal.
Tony
Imagination is more important than knowledge - Albert Einstein
Click here to visit my Blog - A Bonsai Journey
Click here to visit my Blog - A Bonsai Journey
-
Andrew Legg
- Aussie Bonsai Fan
- Posts: 1404
- Joined: June 24th, 2010, 6:23 pm
- Favorite Species: The ones that don't die
- Bonsai Age: 15
- Bonsai Club: Oyama Bonsai Kai, Ausbonsai
- Location: Cape Town, South Africa
- Been thanked: 2 times
Re: Juniper Landscape
And that's what's so cool about people who do bonsai and realise that they do it for themselves and not for others! Yay!MoGanic wrote:I would definitely enjoy the contrasting elements here but of course that's my opinion. =D.
